Changing a pool light doesn’t have to be complicated when you follow the right steps. Expert pool builders recommend starting with a thorough inspection and always turning off the power before any work. You’ll need basic tools, such as a screwdriver, a voltage tester, and your replacement bulb. The process involves removing the old light, installing the new one with proper waterproof connections, and testing everything before you finish. This guide walks you through each step to help you complete this project safely and efficiently.
Inspecting Your Pool Light
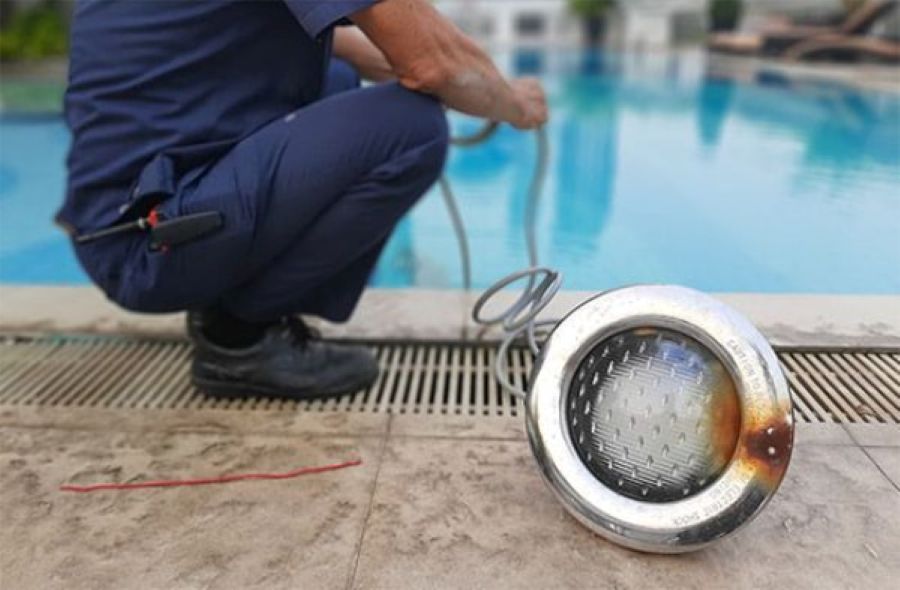
Before you start changing your pool light, take time to examine the existing fixture for damage or wear. Turn off all power to the pool light at the circuit breaker to stay safe. Carefully remove the light fixture’s cover to expose the inner components. Check the wiring for any fraying or exposed areas that could cause problems. Inspect the gasket or seal around the light fixture for signs of wear that could lead to water leakage. Look for corrosion on the metal parts inside the fixture, since this could affect how well it works. A detailed inspection helps you spot any issues before moving forward with the replacement.
Gathering Your Tools
Having the right tools ready makes changing a pool light much smoother. Here’s what you’ll need:
- Screwdriver: A flathead or Phillips screwdriver to open the light fixture.
- Voltage Tester: Confirms the power is off before you start work.
- Replacement Bulb: Have the new bulb ready to install once you remove the old one.
- Silicone Lubricant: Apply this to the gasket to help seal the new light.
- Safety Goggles: Protect your eyes from debris and water while working.
Turning Off Power to the Pool Light
Safety comes first, so always confirm the power is off using a voltage tester. No electricity should run through the circuit before you touch anything. Switch off the power at the circuit breaker dedicated to the pool light. After flipping the breaker, use your voltage tester on the light fixture to double-check there’s no live electricity. This step prevents accidents and electrical shocks while you work. Once you’ve confirmed the power is off, you can move forward confidently.
Removing the Old Pool Light
Follow these steps to safely remove your old pool light:
- Turn Off Power: Confirm the pool light switch is off and cut power at the breaker box.
- Drain Water: Lower the water level below the pool light to keep water out of electrical components.
- Remove Fixture Screws: Use a screwdriver to loosen and remove the screws holding the light fixture.
- Disconnect Wiring: Carefully detach the wiring from the old pool light, making sure no live wires are exposed.
- Take Out Old Light: Gently pull out the old pool light from its niche without damaging the surrounding area.
Installing the New Pool Light
With the old light removed, you’re ready to install the new one. Start by confirming the power remains off at the breaker. Check that all components of the new light are present and undamaged. Attach the new light securely to the niche and make sure the gasket sits properly to prevent water leakage. Connect the wires according to the manufacturer’s specifications, typically matching color to color. Use waterproof connectors to seal the connections and protect against water damage. Gently place the new light into the niche while being careful not to damage the wires. Follow the manufacturer’s instructions to lock the light in place.
Testing and Securing the Light
Testing your new pool light confirms it works properly and stays safe. Here’s how to finish the job:
- Turn on the Power: Activate the pool light to check if it illuminates correctly.
- Inspect the Seal: Confirm the seal between the light and the pool wall is tight to prevent water leakage.
- Check for Leaks: Look for any signs of water entering the light fixture.
- Secure the Fasteners: Tighten all screws and bolts to firmly fasten the light in place.
- Test Again: Once secured, turn on the light one more time to confirm it functions properly.
Related Topics: